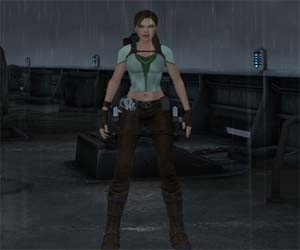
With just an easy to use program you can edit Lara’s outfits and create a variation of an existed outfit or a new one from scratch. You cannot stop here, as you can also edit Lara’s face and gear. Lastly, you can modify a level’s textures and create a new place for Lara to raid.
There are two programs you can choose from: Tomb Ripper or TexMod. Below is a list of what you need for each program. There are also two tutorials for each program: one for the builders and one for the players.
• Tomb Ripper (v1.1b) by Racer_S (33Kb)
Tomb Ripper is the program that extracts the DDS files (from Underworld) and replaces them after editing. The Plug-In is essential for Photoshop and Paint Shop Pro to recognize the DDS file.
Tutorial — Learn how to use the program with a tutorial. This section also includes the common problems that you may encounter (written by shimodax).
(Note: The above link leads to Legend tutorial, but the method is exactly the same.)
Running the outfits (under construction) — If you want to use an outfit, check this guidance. You need Tomb Ripper, so download it from the link above. You do not need Photoshop or the DDS Plug-In, but there are a couple of times that are useful. You can read more details in the tutorial.
• TexMod by RS (590KB)
TexMod is the program that extracts the necessary files from the game (in TGA, BMP, JPG, PNG, DDS etc format) and uses them after editing. This program gives you the option to preview the textures in the game before extracting.
Tutorial — Learn how to use the program with a tutorial (written by Lee). French version also included.
Running the outfits — If you want to run an outfit, check this guidance. You need TexMod, so download it from the link above.
(Note: The above links lead to Legend tutorials, but the methods are exactly the same.)
IMPORTANT: Make sure you have the un-edited (original) .BIG files or the outfit will not show (whether you are a buider or just a player*) . For example, if you have used Tomb Ripper and replaced Anniversary, you need to restore the original .BIG file before using TexMod (if the outfit is based on Anniversary).
* thanks to thompa89 and Yatu for the note.
Converting your DDS files to TPF — If you want to convert your DDS files to a single TPF, you can follow the instructions here (written by Akhenaton).
Which program should I use?
This is really up to you. Here are a few notes about both programs, which might help you.
Tomb Ripper was the first to be found. Racer_S gave us the opportunity to mod(ify) all available textures from Legend and Anniversary(and it works for Underworld too). This program «reads» the .BIG files (that can be found in the Legend folder) and extracts the textures in DDS format. If your paint program does not support this format, you must download the Plug-In. After editing the textures, you need to replace the DDS files. Then, Tomb Ripper replaces the .BIG files, so you can view the changes in the game. As a result, you need to create backups of the original DDS files, in case you want to return back to the original appearance of the textures. As you can probably understand, this procedure is quite troublesome.
TexMod was introduced later. We do not know if it was created before Tomb Ripper, but we learned about it later. RS made this program which again «reads» the .BIG files. In this case, when you extract the texture you can choose between various formats (TGA, BMP, JPG, PNG etc). Whichever paint program you have, it definitely supports one of them. Moreover, the textures are placed in a special folder and you do not need to replace anything, making the task easier to complete.
Bikini Outfits » Enter section Currently hosting: 60 outfits
Pants Outfits » Enter section Currently hosting: 63 outfits
Источник
Tomb Raider «Новая одежда и прически»
Установка:
Безопасная установка (для Steam-версии тоже подходит): 1. Закинуть файл Texmod.exe в папку с игрой (есть в архиве) и выбранные вами моды (для удобства их лучше кидать в отдельную папку внутри папки игры). 2. Переименовать TombRaider.exe в TombRaiderOriginal.exe 3. Переименовать Texmod.exe в TombRaider.exe 4. Texmod работает только на библиотеках DirectX 9, а игра Tomb Raider 2013 самостоятельно включает при первом запуске DirectX 10 (если видеокарта поддерживает его), но также она имеет полную поддержку DirectX9, и чтобы переключится на него принудительно — запустите необходимое исправление в реестре на время пользования этой утилитой — файл DirectX9.reg (входит в архив, копировать его в игру не обязательно). Восстановить режим DirectX10 (вернуть обратно) можно при помощи запуска Restore.reg (входит в архив). 5. Для того чтобы некоторые моды выглядели лучше, нужно выставить определенные настройки графики в рекомендуемые пользователем «Mharius» значения (особенно важно для модов с прозрачной майкой) — запустите файл исправлений в реестре «Adjust Graphic Settings» (входит в архив). Таким образом в игре будут изменены несколько настроек графики, которые вы потом сами в меню (в случае чего) можете сами изменить. 6. Запускать игру из Steam или с ярлыка на рабочем столе (теперь сначала будет запущен Texmod, а после него — игра). 7. В запущенной утилите Texmod нажмите на значок папки в разделе «Target Application» и укажите путь к файлу TombRaiderOriginal.exe. Теперь в том же окне Texmod есть такой же значок желтой папки, но он меньшего размера и находится ниже между двух списков — нажимаете на него и нажимаете «Browse» — укажите путь к вашему моду (файл с разрешением .tpf), а если файлов одного мода несколько — добавляйте все, но проверяйте такие моды отдельно от модов с одним файлом (чтобы не смешивать мешающие друг другу элементы, но могут быть исключения). Теперь нажмите в самом низу окна «Run» — игра будет запущена с выбранными вами модами. Если какой-либо мод не отображается — поменяйте порядок добавления модов или уберите другие (например, волосы «Hair Pack» в данной подборке модов состоят из трех вариантов, но вы добавляете в Texmod только один из них, а не все три сразу).
Примечания: 1. Некоторые антивирусы могут ложно срабатывать на утилиту Texmod (поскольку он грубо вносит изменения в приложение — игру). 2. Для удобства загрузки множества модов (каждый раз при запуске Texmod нужно добавлять их всех заново) можете переименовать все используемые вами моды (когда уже все проверили и вас устраивает окончательная подборка модов) добавив в название каждого файла-мода в начале номер согласно очередности загрузки (некоторые моды не работают если они не первые по списку или имеют низкий приоритет). Например: первый мод имеет название «01-ххх.tpf», а последный 8-й «08-ххх.tpf» (все моды должны быть в одном месте). А в Texmod при выборе модификаций (файлы .tpf) — вы просто выбирете все файлы сразу (мышкой выделяете как обычно) — и нажимаете «Открыть» — таким образом вы сразу добавите в Texmod все нужные вам моды за одно нажатие в нужном порядке загрузки.
Игры Guardian of Light TR: Underworld TR: Anniversary Tomb Raider: Legend The Angel of Darkness Tomb Raider V Tomb Raider IV Tomb Raider III Tomb Raider II Tomb Raider I
Mobile Tomb Raider для PSP Action Adventure DVD
Фильмы Tomb Raider III Cradle of Life Lara Croft Tomb Raider
Комиксы Tomb Raider Другие серии
Материалы Обои для PC Обои для PSP Скриншоты Патчи Трейнеры Сохранения Журналы Музыка Видео
Лара Крофт Биография Одежда Оружие Транспорт Экипировка Официальные модели Голос в игре
Модификации Создание уровней Создание одежды
Информация О Сайте Разработчики Игры Издатели Игры Архив Новостей
Tomb Raider: Underworld
Помощь Прохождение Прохождение демо Коды —> Трейнеры Сохранения
Все про игру Обзор Обложки Диска Журналы Статьи Интервью Подкасты Скриншоты с PC Скриншоты с PS3 Скриншоты с Xbox360 Скриншоты с Wii Скриншоты с DS Скриншоты с PSP —> Ранние скриншоты
Beneath The Ashes Lara’s Shadow
Скачать Демо-версии Патчи Трейнеры Сохранения
Обои Обои фан-арт Обои для PSP Обои с моделью Рендеры


 Прохождение


